Devlog

Rabbit holes & refocusing

Ugh, over five weeks since the last update. Not for lack of thinking about it. Just no progress on the RTS.

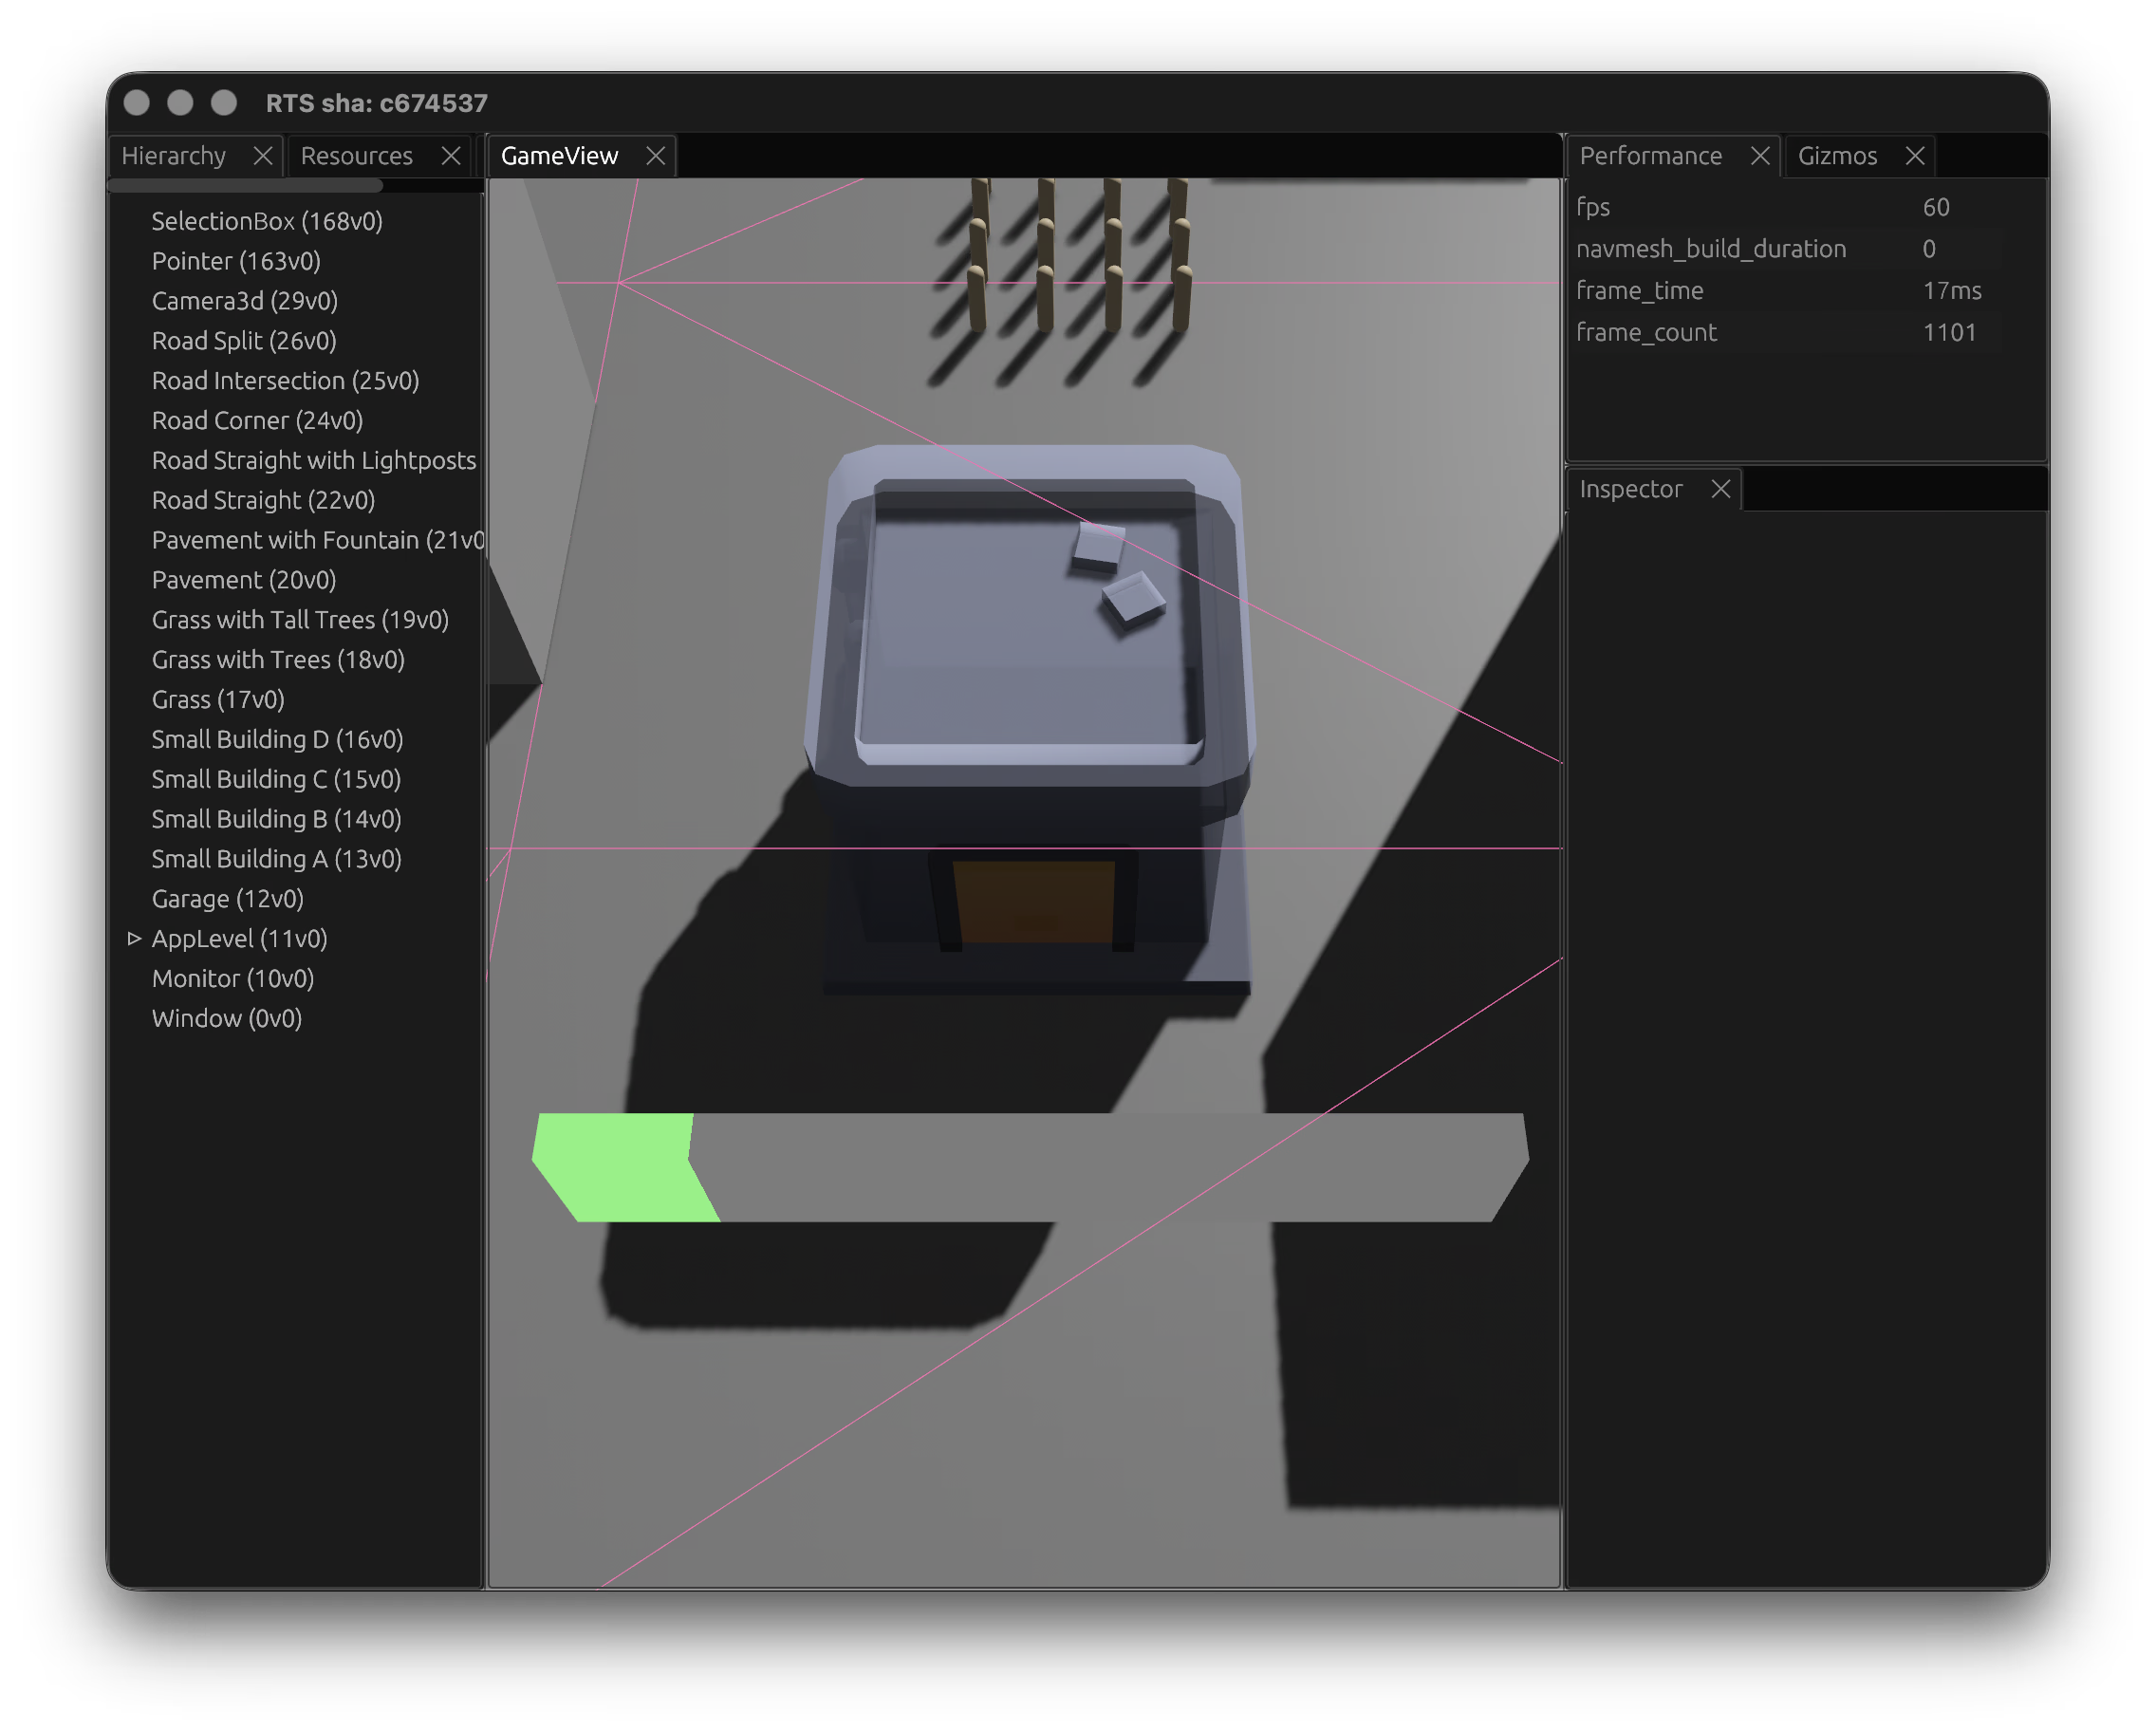
After getting the trait and buff systems in, I started thinking about how the map or level system might scale out. Given an RTS relies on maps, a map editor felt needed. The game needed proper authored levels, and placing things in RON files wasn't going to scale. So I went looking at how other games solve this.

First stop was Hammer and TrenchBroom -- the Quake/Source-lineage editors. They're great at what they do, but they're built around brush-based BSP geometry, which isn't really what an RTS needs. I looked at how they handle entity placement and terrain, but the mapping from "place brushes in 3D" to "place buildings and units on a navmesh" didn't feel right. Having said that the community around these editors is astounding. bevy_trenchbroom seemed like an interesting library to explore more, but not for this project.

From there I looked at other engines. Godot's editor is impressive and its scene system is flexible. Unity's tooling is polished also. I looked through demos and tutorials, and toyed with the idea of building out a map editor within my game, but quickly realised this was a gigantic undertaking. I spent a while thinking about whether you could build a level editor as a Blender plugin, exporting scenes to RON or glTF, since Blender's already good at placing objects in 3D space.

Then I found skein, which might just fit the bill. It lets you edit Bevy scenes directly in Blender, round-tripping data between the two. It was early but it felt closer to the right shape of solution. With Blender installed I started working through various tutorials to get more comfortable before committing to a pipeline.

But I also took this time to step back a little. I'd been building systems - traits, buffs, construction, animations, pathfinding - without ever finishing a playable thing. I needed to land a simple game to scratch that itch. Aside from building games I also spent a lot of time in the world of CSS. As part of this I wrote a long post about CSS colour precision, and decided to take a break from the RTS and refocus on smaller, shippable games. I needed something for readers of "Too Much Color" to viscerally feel the difference, the interactive demos in the post were interesting but I wanted something more fun, so I iterated on a prototype game.

The first iteration was more interactive: two different colours, side-by-side, drag one colour to match the other. It didn't quite hit the mark, which taught me a valuable lesson: iterating on something playable as early as possible can help establish if the core gameplay loop is actually right. What I ended up with was something more subtle: What's My JND -- two adjacent colours in a sharp gradient, where the goal is to click the transition point. Over a pint with my colleague Jake, he suggested 9 colours where 1 is different could be a good gameplay mode, so that evening I iterated on a hard mode variant that removes the gradient crutch. These were fun to build, satisfying to ship, and a good reminder of what "done" feels like.

The original game has received over 4 million hits in 2 weeks, hit the hackernews front-page, made it onto Tom Scott's newsletter, and had some copycats, which all feels like as good a metric of success as any.

The RTS isn't abandoned. But I want to come back to it with better instincts about scoping and finishing, and maybe a clearer picture of what the minimum playable version actually looks like.

Traits, buffs, & leveling

This week's focus was around construction workers. Previously construction sites just ticked progress on their own. Now they track which units are actually working on them via a ConstructionWorkers component, with a ConstructionThroughput model that accounts for diminishing returns as more workers are added. It uses an exponential saturation curve -- one worker always gives 1.0x throughput, but adding more yields diminishing marginal gains based on a configurable coordination_drag parameter. Workers are detected by proximity once they've arrived (no Path component + within range), and are automatically released when the site completes.

This actually became part of a larger system, which includes all kinds of traits that units can have, expressed via their definition. For example, up until now, units had a hardcoded speed field and a can_construct_sites boolean -- fine for getting things moving, but not a foundation that would scale in interesting ways, so I replaced it with something more flexible: a D&D-inspired trait and buff system.

As its core is a TraitKind enum -- Movement, Construction, Attack, Defense, Perception -- with each kind backed by a TraitValue that tracks a base value, buff total, level bonus, and a computed effective value. Each trait gets its own Bevy component with a matching name - generated via a macro.

Trait definitions are loaded from a definitions.ron file that controls per-trait behavior, things like stacking rules (additive vs highest-only), RNG ranges for checks (0 for deterministic, 20 for a d20-style roll), and buff clamping. For example, Attack uses HighestOnly stacking with a d20 check, while Movement uses Additive stacking and is deterministic:

// Definition for the "Attack" trait
(
    kind: Attack,
    name: "Attack",
    rng_range: 20,
    default_dc: Some(10),
    stacking: HighestOnly,
    max_buff: Some(30),
),

Traits also buff. Each Unit can have many Buff components. Each Buff component carries an id, a trait kind, a value, and metadata about its type (permanent, temporary with a duration, or proximity-based) and source. All buffs get collected up into the matching trait, which computes the effective value, with all the stacking rules and logic and such. Practically this means units can have a base Attack of, say, 10, but effects in game (garrisoning, proximity to allies) can temporarily bump that by 5, whereas the units level might permanently raise it to 20.

Ah, yes, leveling. Units can also have a LevelConfig component with XP thresholds and per-level trait bonuses, plus XpRules that define how XP is earned -- the Builder unit for example earns Construction XP while actively constructing:

// level_config definition for Builder unit
level_config: Some((
    thresholds: [0, 100, 500, 2000],
    level_bonuses: [
        (level: 1, trait_bonuses: { Construction: 1 }),
        (level: 2, trait_bonuses: { Construction: 2, Movement: 1 }),
        (level: 3, trait_bonuses: { Construction: 3, Movement: 2 }),
    ],
)),

This is all conceptually a little vague but it feels like a good system to grow into. Traits themselves are easy to add (a macro makes this as easy as define_trait!(Movement)), but their curves are endlessly tweakable via definition files, meaning no recompiles to balance units.

Unit animations

This week was spent getting animations working. The Quaternius model comes with a set of named animations, but getting them to play correctly in Bevy turned out to be trickier than expected.

I decided to load the full GLTF asset then hook up animation names to definitions.ron, so e.g. a unit has idle: "Idle_Loop", moving: "Sprint_Loop" so it was "just" a matter of running these.

The bigger challenge was timing. In Bevy, when you spawn a SceneRoot the scene's children - including the AnimationPlayer - aren't available immediately. They're spawned asynchronously. So any attempt to play an animation right after spawning the unit would silently fail. So I implemented a two-phase setup: first a NeedsAnimationSetup component waits for the GLTF to load and builds the AnimationGraph, then a NeedsInitialAnimation marker waits for the AnimationPlayer to appear in the entity's children before kicking off the idle animation:

fn start_initial_animations(
	query: Query<
		(Entity, &UnitAnimations, &UnitAnimationState),
		With<NeedsInitialAnimation>,
	>,
	children_query: Query<&Children>,
	animation_player_query: Query<&AnimationPlayer>,
	mut commands: Commands,
) {
	for (entity, animations, state) in &query {
		let Some(player_entity) = find_animation_player(
			entity,
			&children_query,
			&animation_player_query,
		) else {
			continue;
		};
		let node = match state.0 {
			UnitState::Idle => animations.idle,
			UnitState::Moving => animations.moving,
		};
		commands.entity(player_entity).insert(
			AnimationGraphHandle(animations.graph.clone()),
		);
		commands.entity(player_entity)
			.queue(move |mut entity: EntityWorldMut| {
				if let Some(mut player) =
					entity.get_mut::<AnimationPlayer>()
				{
					player.play(node).repeat();
				}
			});
		commands.entity(entity)
			.remove::<NeedsInitialAnimation>();
	}
}

With animations sorted, I moved on to unit movement. Units need to rotate toward the direction of travel, so adding a simple slerp toward the movement direction handles this nicely, interpolating smoothly so the units don't snap instantly:

if distance > 0.01 {
	let direction = toward.normalize();
	let target_rotation =
		Quat::from_rotation_y(direction.x.atan2(direction.z));
	transform.rotation = transform.rotation.slerp(
		target_rotation,
		(time.delta_secs() * 10.0).min(1.0),
	);
}

I also pulled the hardcoded movement out and into definitions.ron. Small change that will be useful for different unit types.

The result is units that animate, face the direction they're moving, and smoothly transition between idle and sprint:

Units & Buildings

With the new Kenney assets for buildings, these grey blocks and beige capsules weren't really cutting it so I thought I'd replace the grey blocks in the map with the same buildings, then I went on the hunt for a good placeholder asset for units, and discovered Quaternius' fantastic universal animation library. I thought I'd also take the opportunity to remove the slew of hardcoded functions that create these units and map objects, and actually build out a map definition which can then be used as the basis for... well, maps.

I went into this thinking it would be straightforward but I ran into some surprising difficulties. Taking a map.ron and loading it was fine, but then came asset loading issues, because loading so many glbs at once caused visible pop-in, as I hadn't handled any form of asset loading. So I introduced a new asset loader based on Tainted Coders' Advanced Asset Techniques section. This all worked really nicely and the code feels better for it; pulling the game world from a Ron file rather than manually coding meshes.

The next issue was that path-finding broke, and selection broke. These were two issues with the same root cause: while the building and unit entities used to be simple meshes, they were now "SceneRoots", and the Aabb which was on the entity was now on a child entity. For now I've fixed this by adding Aabbs to these entities and adding a new system to compute their Aabb bounds from their child Aabbs. I don't like this system but it'll do for now, and I'll come up with something smarter, later on.

I'd hoped to have the time to tackle some unit movement animations but given the time it took to get all of the asset systems built and path finding and selection systems refactored, I didn't find time by the end of it all to tackle animations.

All this to say, the net result doesn't look so different, the main visual change is pulling in models rather than simple shapes:

Tweaking selection

I thought I'd dip more into shaders this week, and refine the somewhat clunky selection indicators. I didn't like how for each unit two meshes were created: one for the "over" (hover) state and one for the selected state. These two circle meshes were likely simple enough but armed with my new shader knowledge I thought I could simplify down to a single mesh that updated its material via a fragment shader depending on state.

I also added some configuration options to the SelectionIndicatorMaterial to allow customising of colours and borders:

struct SelectionIndicatorMaterial {
    is_over: bool,
    is_selected: bool,
    inner_radius: f32,
    over_color: vec4<f32>,
    selected_color: vec4<f32>,
};

@fragment
fn fragment(in: VertexOutput) -> @location(0) vec4<f32> {
    // Discard pixels outside the outer radius
    let distance = length(in.uv - CENTER) * 2.0;
    if distance > 1.0 {
        discard;
    }

    let in_annulus = distance >= material.inner_radius;

    if material.is_over && in_annulus {
        return material.over_color;
    } else if material.is_selected {
        return material.selected_color;
    }

    discard;
}

This results in a much nicer single mesh material for all selection states:

Building Progress

This week I wanted to further the building system to add placement and construction. This works by using the BuildingGhost; when a click occurs with an active BuildingGhost then a new ConstructionSite is spawned in that position. The ConstructionSite has a Bar component that shows the progression - how long until the building is constructed - based on the buildings construction time in definitions.ron.

The first iteration of the Bar was a Cuboid just to get the basics down:

A screenshot of a placed building, showing a 3d cuboid progress bar just below
the building. The cuboid is half "filled" with a lime green color

This clearly needed improving. I want the progress bar to billboard. I found bevy_mod_billboard which seemed just the ticket, however this was last updated to support Bevy 0.14. I peeked at the code, and figured out the real magic was within billboard.wgsl. So with that as a reference and a slew of other resources and guides (1, 2, 3, 4, 5) I set to work building my own (which I'll keep until maybe bevy gets it built-in at least).

The result is this bit of wgsl. The vertex shader re-orients the vertexes to always face the camera, while the (very simple) fragment shader colours the in-progress section. Fortunately not too much math as Bevy has some useful built in functions:

@vertex
fn vertex(vertex: Vertex) -> VertexOutput {
    var out: VertexOutput;

    // Get entity world position (includes parent transform + local offset)
    let entity_world_pos = get_world_from_local(vertex.instance_index)[3].xyz;

    // Transform to clip space
    let clip_position = position_world_to_clip(entity_world_pos);

    // Scale based on depth for consistent screen size
    let scale = max(10.0, clip_position.w / 40.0);

    // Billboard: add XY offset in clip space
    out.position = vec4<f32>(
        clip_position.x + scale * vertex.position.x,
        clip_position.y + scale * vertex.position.y,
        0.0,  // Near plane - renders on top of everything
        clip_position.w
    );
    out.uv = vertex.uv;
    return out;
}

@fragment
fn fragment(in: VertexOutput) -> @location(0) vec4<f32> {
    return select(
			material.background_color,
			material.color,
			in.uv.x <= material.progress
	);
}

The result? A nice clean animated progress bar that faces the camera, no matter the rotation or zoom:

Building System

This week I thought I'd get to work on a system for pick-and-place buildings. My vision is to not end up with traditional RTS style pick-and-place, but for now making what I'm familiar with and iterating sounded like a sensible approach. I've gone with a Command & Conquer style pick-and-place, where players select a building from a palette and get a "ghost" building they can lay down onto a grid-snapped map.

However it's now 2026 and we don't need square tiles to show where the building will be placed, and I didn't want to use more grey boxes - not just because they're boring but I also need to look at how Bevy's asset loading systems work. I took a peek at this city builder demo from Kenney who provides wonderfully crafted assets sets. Pulling in some of the glbs, with some ron through serde to pull in definitions and size, I built an asset loader that loads all of the assets.

From there, I added a GridPosition struct that simply rounds world coordinates to create a grid snapping effect, and a PlayerCursorMode state which tells the engine if the user is able to select units, or if their building BuildingGhost should be visible. The BuildingGhost simply follows the mouse position with a ray:

let Some(mut cursor) = window.cursor_position() else { return };

// Generate a ray from the active camera
let Some(ray) = cameras.iter().find_map(|(camera, transform)| {
	if let Some(viewport) = &camera.viewport {
		cursor -= camera.to_logical(viewport.physical_position).unwrap_or_default();
	}
	camera.viewport_to_world(transform, cursor).ok()
}) else {
	return;
};

let t = -ray.origin.y / ray.direction.y;
// Ray doesn't intersect plane (pointing away)
if t < 0.0 {
	return;
}

let intersection = ray.origin + ray.direction * t;

// Snap to grid
let grid_pos: GridPosition = intersection.into();
let snapped_world_pos: Vec3 = grid_pos.into();

// Update all ghost transforms
for mut transform in ghosts.iter_mut() {
	transform.translation = snapped_world_pos;
}

The result is a ghost building perfectly following the cursor, but also snapping to a 1x1 unit grid:

Hello again

That weekly update thing really slipped off. Around April I found myself applying for, and accepting a new job, which has been very rewarding but very challenging. I only had a few hours a week to work on personal projects, but with on-ramping to a new job as well as maintaining existing projects, game dev had to be put aside for a little while. However given it's a new year, and I'm feeling more comfortable and confident at work, I'm trying to find my way back to this.

So it sat, unloved, until late last year when I tried to pick this back up again and update some dependencies, but I found that Polyanya and Vleue Navigator needed updates, so I sent PRs to update those libraries. Polyanya just needed some version bumps, and Vleue Navigator had a few more changes, but luckily the Bevy migration guides make this quite straightforward. Waiting for those to release distracted me enough that I didn't pick this back up again until just now that I've finally updated this engine to Bevy 0.17.3. No new screenshots or videos, but just the knowledge that we're back.

Path Finding.

This week I introduced a path finding system for units. Going in, I expected to be searching for an A* path finding library, but I decided to first research the options for state-of-the-art path finding systems for many units, which sent me down a rabbit hole. The first stop was Flow Fields / Vector Fields. I couldn't find an off-the-shelf library for flow fields in Bevy so in order to build myself up to writing one I began looking for more applicable literature. I landed on a fantastic devlog on building an RTS which covered FlowFields in excellent detail, but exploring the rest of the blog lead me to "Dynamic Navmesh with Constrained Delaunay Triangles". This post goes into a lot of detail around solving performance of navmeshes within unity, but my take-away was that it would be a more flexible solution, albeit one that requires more computation. I tried to look further to see if more recent research had more optimal solutions. Eventually I landed on a paper titled "Fast optimal and bounded suboptimal Euclidean pathfinding" - maybe one day I'll spring the $35 to pay for it so I can read it but - the excerpt alone proved very useful, as it mentioned that it's an optimisation over the cited "Polyanya" algorithm. This algorithm seems to be covered in the paper "Compromise-free pathfinding on a navigation mesh". The top result for "Polyanya" isn't the paper itself, but a rust library! It must be fate. Further still, vleue/vleue_navigator seems to be a bevy implementation for generated navmeshes and using polyanya to pathfind on them, so this felt like a sure bet.

So with most of the week over, I set to integrating this library. I introduced a Waypoint component which each Unit requires. Right clicking the mouse ray-casts to find the Ground and hands the Vec3 hit to the Waypoint on all selected units (using my PointerSelections component). Thanks to the foundations laid in the last few weeks, it was very simple to get this implemented. Waypoints represent "where the player wants the unit to be" making it quite simple to get Vleue Navigator to connect the dots:

fn update_path_from_waypoint(
	movables: Query<(
		Entity,
		&Transform,
		&Waypoint,
		Option<&PathFinder>
	), Changed<Waypoint>>,
	navmeshes: Res<Assets<NavMesh>>,
	navmesh: Query<(&ManagedNavMesh, &NavMeshStatus)>,
	mut commands: Commands,
) {
	// ...
	for (entity, transform, waypoint, path_finding) in movables.iter() {
		let from = transform.translation.xz();
		let to = waypoint.position().xz();
		if let Some(path_finding) = path_finding {
			path_finding.compute(mesh, from, to);
		} else {
			let path_finding = PathFinder::default();
			path_finding.compute(mesh, from, to);
			commands.entity(entity).insert(path_finding);
		}
	}
}

With the path being computed each time the Waypoint changes, it was then just a case of moving any unit along its path... Except that Vleue Navigator's paths are of course multi-point, to allow for navigating around obstacles. I didn't have time to implement a way for units to navigate to subsequent points; when they reach the end of the first point they stop. I think the best solution for moving across multiple points is to pop the 0th point from the path vector every time the entity moves on top of it, however that doesn't feel very robust, so I'll be looking at this in more detail next week.

The other problem is that multiple units do not consider each other, selecting multiple units and commanding them to one location means they end up stacking over each other. This will also need some solution as it's far from desirable. Perhaps one solution here is that the user clicking gives an indication of a waypoint to set, but not the exact space the unit will move to. Or perhaps implementing a Boids system is next on the agenda.

Developer Tooling.

This week I chose to work on some developer tooling to make it easier to visualise and alter parts of the game during runtime. Motivated by last week's work on the selection code, where I found myself in a tweak-recompile-try-repeat loop. I think some interactive developer tools would provide much quicker feedback loops, so it feels like getting this established now will pay dividends later. I created a devtools feature flag to scope all of this too, took a deep breath and set out to build the devtools crate...

Luckily this was way simpler than I imagined it would be, dropping in bevy_inspector_egui coupled with egui_dock got me very close. Going back and deriving Reflect on all my components was also a must. Beyond that I added a couple of custom panes that I was kind of surprised didn't exist off-the-shelf (at least that I could find). One of the custom panes shows the fps/frame count using bevy's built in DiagnosticsStore. Quite simple:

let diagnostics = self.world.resource_mut::<DiagnosticsStore>();
egui::Grid::new("performance")
  .num_columns(2)
  .spacing([40.0, 4.0])
  .striped(true)
  .show(ui, |ui| {
    for diagnostic in diagnostics.iter() {
      let value = diagnostic
        .average()
        .or_else(||
          diagnostic.smoothed()
        ).unwrap_or(0.);
      ui.label(diagnostic.path().to_string());
      ui.label(
        format!(
          "{value:>.0}{suffix:}",
          suffix = diagnostic.suffix
        )
      );
      ui.end_row();
    }
  });

The other was a pane to enable & disable debug Gizmos. Bevy's Light & AABB controls have built in Gizmos for debugging. Getting these working was quite straightforward by using bevy's reflect module. Iterating over GizmoConfigStore entries, this code tries to grab the draw_all field, to turn it into a checkbox in the UI:

egui::Grid::new("gizmos")
  .striped(true)
  .show(ui, |ui| {
    let mut gizmos = self
      .world
      .resource_mut::<GizmoConfigStore>();
    for (_, config, value) in gizmos.iter_mut() {
      let name = value
        .reflect_short_type_path()
        .to_owned();
      let ReflectMut::Struct(value) = value
        .reflect_mut() else { continue };
      let Some(enabled) = value
        .field_mut("draw_all") else { continue };
      let Some(mut enabled) = enabled
        .try_downcast_mut::<bool>() else { continue };

      ui.checkbox(&mut enabled, name);
      ui.end_row();
    }
  });

I find both of these implementations to be quite elegant in how generic they are. I imagine I'll be able to trivially add new diagnostics to the DiagnosticStore, while also it should be possible to implement draw_all as a field in new Gizmos, should I need that (e.g. for path finding, which I aim to tackle next).

The result of all this is that with the --features devtools enabled, the game loads up with the inspector view which will make runtime debugging far easier:

Selection.

This week I worked on a selection engine for picking units to control. Most of the work builds upon Bevy's picking engine, which has a built-in way of managing cursor hover/click events by using ray-casts to find a mesh. The picking engine, as I learned this week, used to be a third party module called bevy_mod_picking, but it seems Bevy does a good job of upstreaming very popular libraries.

One thing the picking engine doesn't handle is selection. This is handled by bevy_mod_picking's bevy_picking_selection crate, but it looks like that wasn't folded into Bevy's picking module (perhaps it will be later). This meant I had to write something myself. I think my solution is a little more flexible than the mod picking one - it takes Pointer<Down> and Pointer<Click> events dispatching new Pointer<Select> and Pointer<Deselect> events. This system is quite straightforward - anything clicked gets queued up for selection, and after that system runs, another one replaces the current selection with the queued one, and dispatches events. It even allows for multi-select. Coupling this with a SelectionIndicator component, means a unit can toggle between "over" and "selected" states. The SelectionIndicator might be the more interesting piece:

#[derive(Component, Copy, Clone, Debug, Reflect)]
#[reflect(Component)]
#[component(on_add = setup)]
pub struct SelectionIndicator {
	over: bool,
	selected: bool,
}

fn setup(mut world: DeferredWorld, entity: Entity, _: ComponentId) {
	world
		.commands()
		.entity(entity)
		.observe(move |
			trigger: Trigger<Pointer<Over>>,
			mut query: Query<&mut SelectionIndicator>
		| {
			if let Ok(mut indicator) = query.get_mut(trigger.entity()) {
				indicator.over = true;
			}
		}).observe(move |
			trigger: Trigger<Pointer<Out>>,
			mut query: Query<&mut SelectionIndicator>
		| {
			if let Ok(mut indicator) = query.get_mut(trigger.entity()) {
				indicator.over = false;
			}
		}).observe(move |
			trigger: Trigger<Pointer<Select>>,
			mut query: Query<&mut SelectionIndicator>
		| {
			if let Ok(mut indicator) = query.get_mut(trigger.entity()) {
				indicator.selected = true;
			}
		}).observe(move |
			trigger: Trigger<Pointer<Deselect>>,
			mut query: Query<&mut SelectionIndicator>
		| {
			if let Ok(mut indicator) = query.get_mut(trigger.entity()) {
				indicator.selected = false;
			}
		})
}

Picking individual units can be time consuming though, so I wanted "box" style selection. I couldn't find anything similar (bevy_mod_picking nor bevy picking had modules or examples, and a web search turned up empty). So I wrote a box selection utility for this. This became the most complex piece. The box that gets drawn needs to be facing the camera, but checking the collision with entities in world space. It took a few days of reading and understanding just to come up with these 4 lines:

let world_from_local = transform.affine();
let aabb_center_world = world_from_local
	.transform_point3a(aabb.center)
	.extend(1.0);
let position = aabb_center_world.xyz();
if let Ok(xy) = camera.world_to_viewport(camera_transform, position) {

The result however, was worth it. Selection boxes will highlight any element whose AABB center is within the bounds of the box, and releasing the mouse pointer will take all of those highlighted units and select them, using the same Pointer<Select>/Pointer<Deselect> events, meaning the SelectionIndicator "just works", without any knowledge that the selection box systems are running or even exist:

Camera movement.

This game is going to be a top down real time strategy game. I have the ambition to set it in a city, and so I wanted to work a bit on a camera system to enable that.

In most RTS games the camera is a top down view of the world, the player has a commanding view over the world - the camera isn't attached to any one object. While classic RTS games of the 90s and 00s had a fixed view, this was largely due to limitations of sprites, and so movement was largely limited to panning. This game will be fully 3d, so in addition to panning, I'll be adding zooming, and rotation.

So I created a very basic 3d view with some block shapes which represent buildings, and created Camera & CameraController components. The controller allows the camera to pan with WASD as well as the Arrow Keys, and the mouse while holding space or middle click. Using Leafwing Input Manager simplified this a lot. The zoom functionality also rotates on an EasingCurve, meaning as the player zooms in the camera pitches up, giving them more of a "third person" view, rather than top down. I hope this will let players get in close to the action when they need to.

pub fn adjust_camera_angle_based_on_zoom(&mut self) {
	self.target_angle = self.min_angle.lerp(
		self.max_angle,
		self.easing_curve.sample_clamped(self.target_zoom)
	);
}

Given there will be a lot of verticality to a top down view of the city, I also decided to have the camera try to keep a fixed distance from the ground. Every time the camera moves it ray-casts out to the world, finding the Ground component (which the buildings, as well as the floor plane, possess). The intersection point of the ray cast becomes the new minimum height the camera sits at. This works somewhat well, but due to the ray being a single point it's possible for the camera to be close to a building without being directly on top of it, which means it feels more arbitrary than intentional. Some improvements to make later would perhaps be to fire multiple rays around the center of the camera - rather than just one - and take the max. Alternatively, perhaps it would be better to use more traditional collision system by checking AABBs within the bounds of the frustum and getting the max height; one issue here is that the camera pitch can wind up so that many buildings are in front, which might cause problems. Keeping the code well separated by putting simple methods in the structs impl will, I think, keep things flexible; the basic code for the ray-cast becomes:

let hits = ray_cast.cast_ray(
	camera.ray_from_center(),
	&RayCastSettings {
		filter: &|entity| grounds.get(entity).is_ok(), ..default()
	},
);
if let Some((_, hit)) = hits.first() {
	camera.move_focus_height(hit.point.y);
} else {
	camera.reset_focus();
}

Either way, here's what it looks like so far:

Hello World.

I've decided to try to build a game. Game development fascinates me, and I think I'd enjoy developing a game more than playing it. I've been toying around with the idea since early-2023. First I tried writing a simple ECS in TypeScript, and built a basic Pong clone. Around February I moved on to toying with Bevy, but ultimately I paused in May 2023.

Throughout 2024 I wrote a lot of Rust in order to improve my skills. I made a few simple web sites using Actix, and built some bigger projects from scratch. I wrote about 100,000 lines of Rust in 2024, which helped improve my understanding of it immensely, which made Bevy less intimidating.

Now that we're in 2025, I'm going to revisit this. I'd like to build a real time action strategy game, like the classics from the 90s & 2000s. My inspiration comes from Bullfrog games like Syndicate, Theme Hospital, Dungeon Keeper, and the amazing Westwood Studios games like Dune and Command & Conquer. They were the games I enjoyed as a teen and I'd love to recreate something which pays homage to them.

In order to keep myself on track, I intend to write here, every Saturday, explaining what I've managed to accomplish in the week before. I'll be developing this in my free time so these updates might be small, but hopefully I'll make useful progress each week.

To that end, today I managed to make a simple menu. Not much but it's a start:

A screenshot of game entry screen, it shows a grey background with three buttons: "Play", "Options", and "Exit Game"